
DIY Pallet Wood Mail Organizer & 3-Key Holder

♻️ From Scrap Wood to a Useful Wall Organizer
Do you have some old pallet wood or leftover pieces of reclaimed wood sitting around?
Instead of throwing them away, turn them into something useful for your home!
In this DIY project, I’m making a rustic pallet wood mail organizer with three key hooks. It combines a small shelf for letters, envelopes and everyday items with three hooks underneath for your keys.
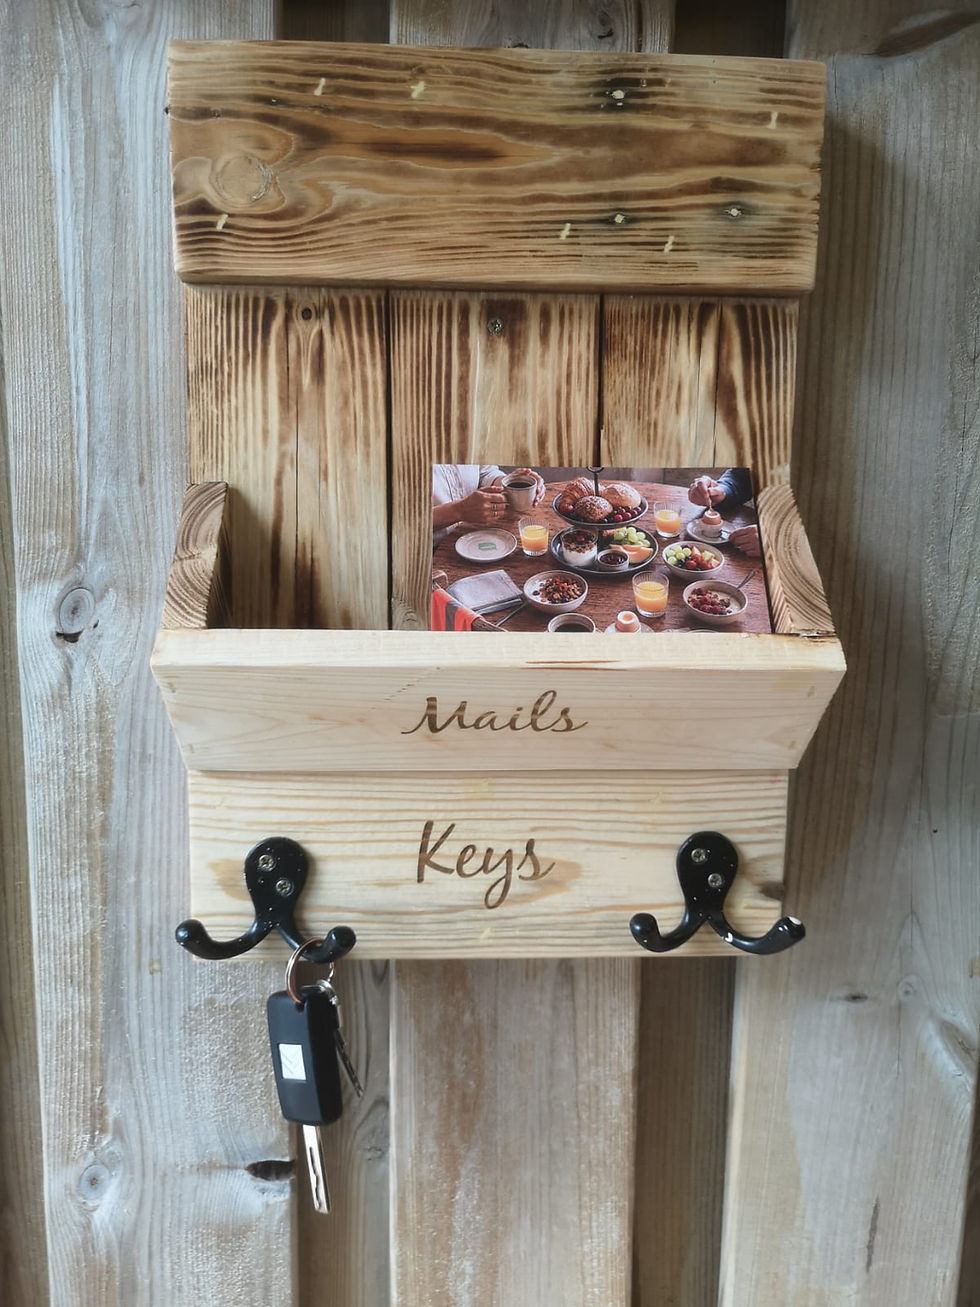
It’s a simple woodworking project that requires only a few pieces of wood and basic tools.
Free 3D plan soon here...
🛠️ Materials
For this DIY pallet wood organizer, you'll need:
Reclaimed or pallet wood
Wood stain, oil or finish (optional)
Tools
📐 Step-by-Step: How to Make It
1. Prepare the pallet wood
Start by selecting straight pieces of pallet or reclaimed wood.
Remove any nails or screws and make sure the wood is clean and safe to work with.
Cut the boards to the required dimensions for the back panel, mail holder and front support.

Tip: Keep some of the natural imperfections in the wood. Knots, cracks and different wood tones give the organizer its rustic reclaimed-wood character.
2. Sand the wood
Sand all the pieces to remove rough edges and splinters.
You don't necessarily need to make the wood perfectly smooth. For a rustic DIY look, keeping some of the original texture can make the finished project much more attractive.
3. Build the mail holder
Assemble the pieces that form the small front compartment.
Apply wood glue where appropriate and reinforce the joints with screws.
Make sure the front board is positioned high enough to keep letters, envelopes and small documents securely inside.
4. Attach the mail holder to the backboard
Position the completed mail holder on the reclaimed wood back panel.
Check that everything is square before securing it with screws.
This is where your organizer starts to take shape!
5. Add the three key hooks
Measure and mark three evenly spaced positions underneath the mail holder.
Drill pilot holes if necessary and install the three metal key hooks.
You now have a dedicated place for three sets of keys.
6. Give it a finish
You can leave the pallet wood completely natural, or apply:
Wood oil
Stain
Clear varnish
Wax
For this type of project, I personally like keeping the natural reclaimed-wood appearance because it gives the organizer a warm, rustic look.
7. Mount it on the wall
Finally, choose a convenient location near your entrance.
Use appropriate wall plugs and screws for your wall type and make sure the organizer is securely fixed.
Now you have a practical mail organizer and 3-key holder ready for everyday use!
🎥 Watch the Short DIY Video
Want to see how this pallet wood mail organizer and key holder comes together?
Watch the short DIY video below and follow the transformation from reclaimed wood to finished wall organizer.
👉
💡 Why I Love This DIY Project
The best thing about this project is that it doesn't require much material.
A few pieces of scrap pallet wood, three hooks and some basic hardware can become a useful piece of home organization.
It's also a great project for anyone interested in upcycling, sustainable woodworking and DIY furniture.
Instead of buying a mass-produced organizer, you can create one yourself and give discarded wood a second life.
♻️ Final Thoughts
This DIY pallet wood mail organizer with 3 key hooks is a simple weekend woodworking project that combines functionality, rustic style and upcycling.
It's perfect for an entryway, hallway, workshop or even a small office.
And the best part? You can customize the size, number of hooks and finish to match your own space.
Have some scrap pallet wood? Don't throw it away turn it into something useful! 🔨♻️


Comments